How to check a website’s uptime. Step-by-step guide for UptimeRobot
Knowing your website’s uptime is very important. When your website is down, you are losing visitors and therefore money (orders, ad impressions, etc.).
How can we make sure it is down as little as possible? Uptime monitoring!
The faster we know something has happened, the faster we can react and fix the problem.
The best way to check your website’s uptime is to use third-party services. It is easy to set up and pretty cheap compared to self-hosted solutions.
For self-hosted, you’ll need skills to install it, monitor its uptime, and make sure it works correctly. On the other hand, you can use the $0-7 service and not spend any time on that.
There are many uptime monitoring services on the market. I personally, use UptimeRobot. But there are StatusCake, BetterUptime, FreshWorks, and many others.
And, because I’m using UptimeRobot, which has 50 uptime monitors with 5-min checks for free, I will show you how to set up website monitoring with that service.
So let me show you how to use UptimeRobot:
1. Creating your account.
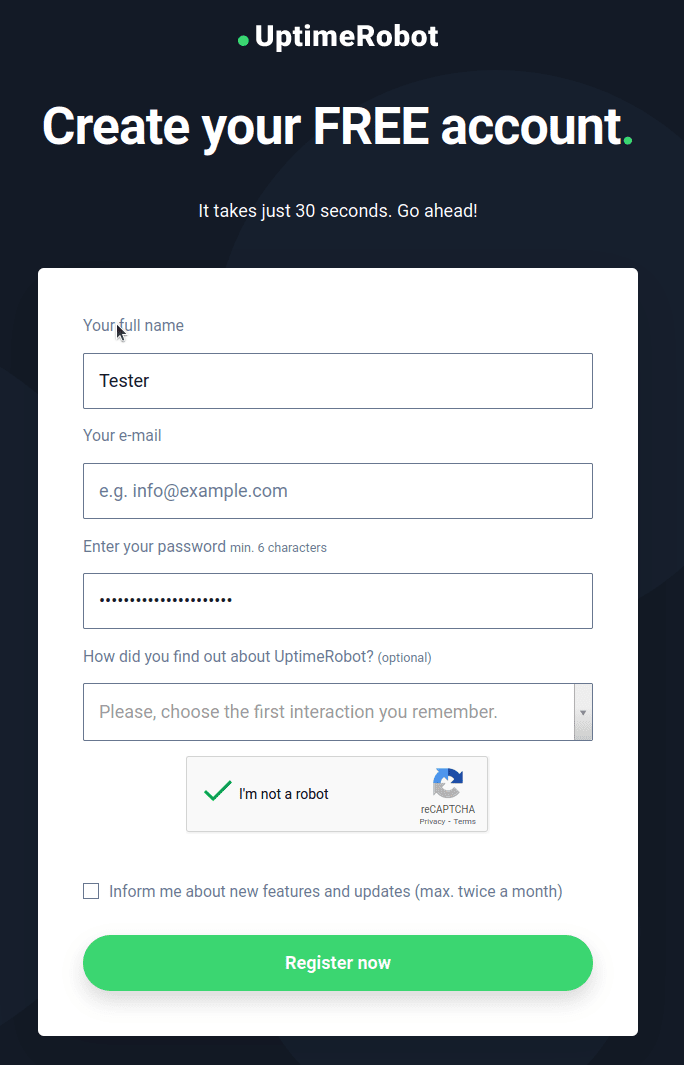
Go to UptimeRobot’s sign-up page, fill out a form there, and submit it:
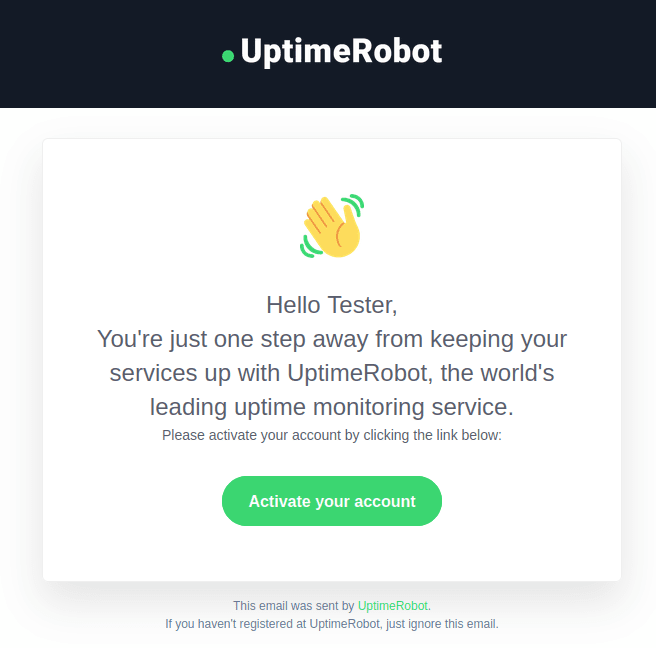
Then go to your inbox and click the “Activate your account” button in the activation email they sent you:
2. Setting up your first uptime monitor
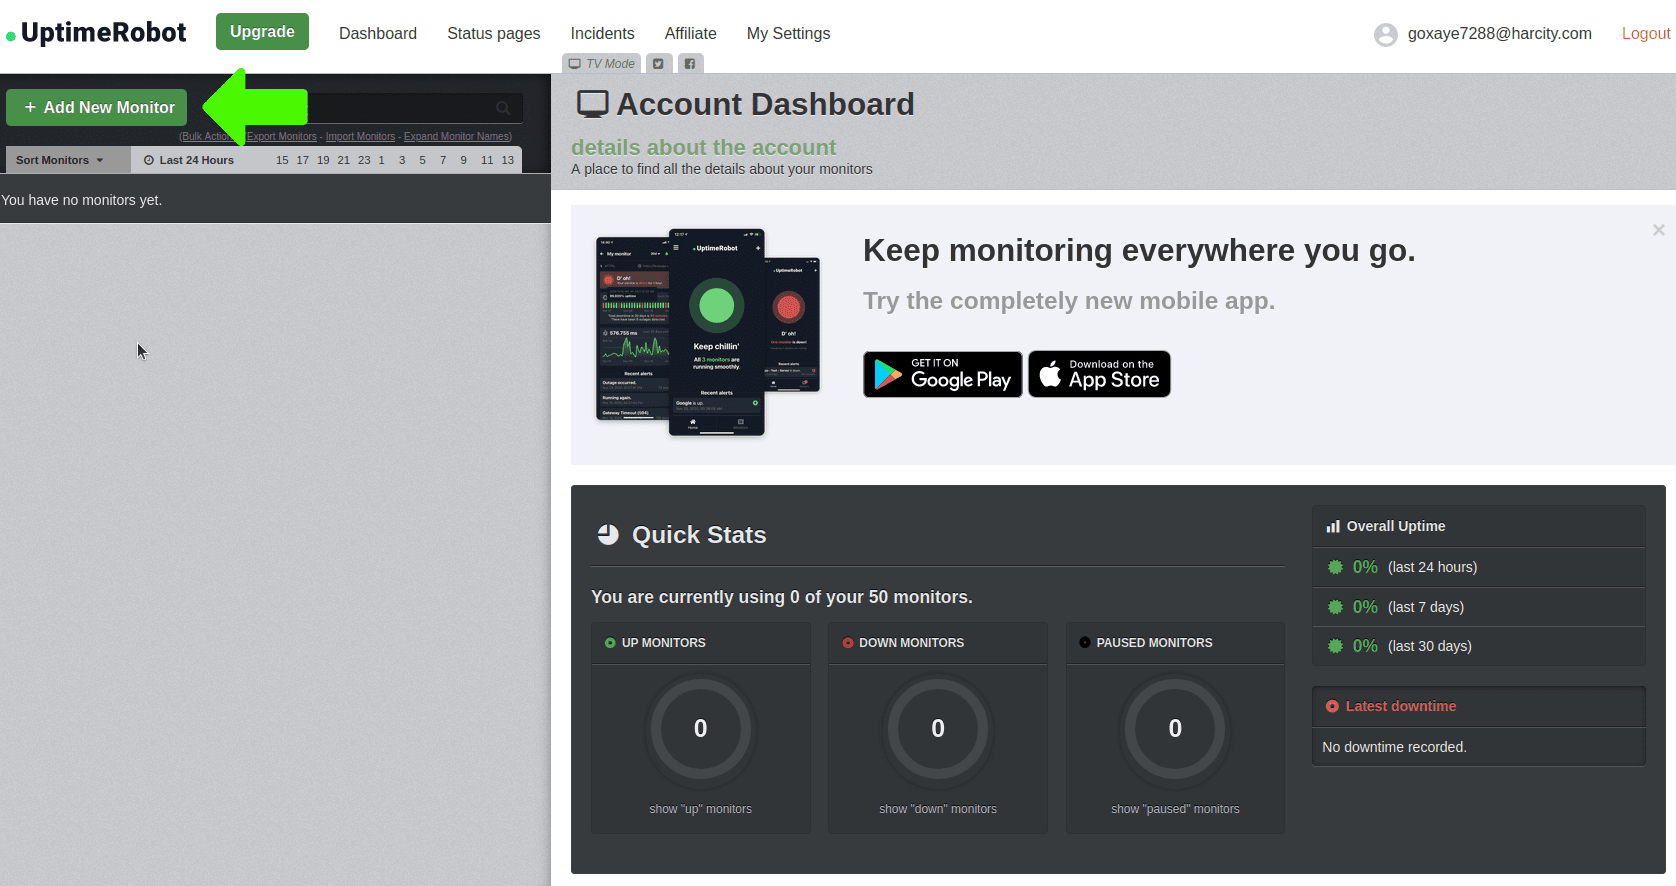
Clicking the button in the email in the previous step will get you to UptimeRobot’s dashboard.
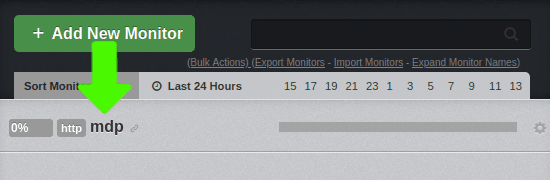
Press the “+ Add New Monitor” button at the top left:
At the opened modal window, select HTTP(s) in Monitor Type’s dropdown:
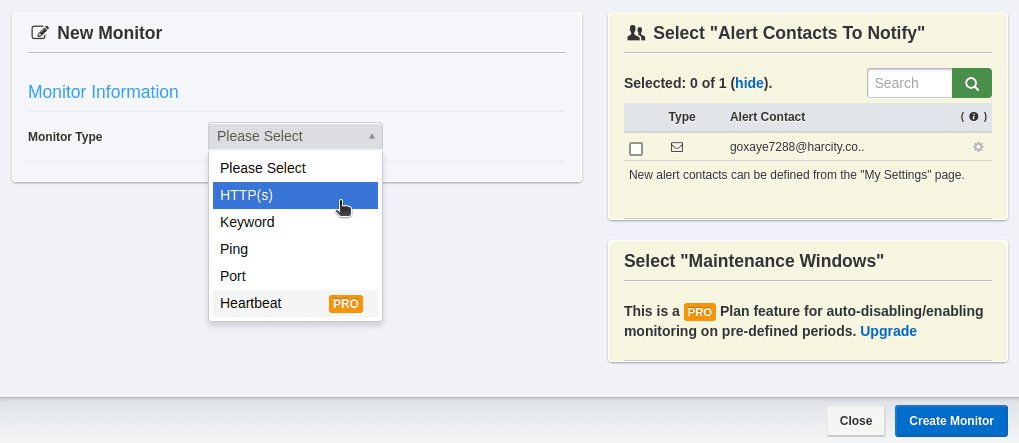
Fill in the fields:
- Friendly name — just the name of your website or some shortcut.
- URL (or IP) — URL of your website including HTTP:// or HTTPS:// in the beginning.
- Monitoring interval — 5 minutes as it is the fastest available check for UptimeRobot’s free plan.
- On the right, you may click on the checkbox next to your email. You will get notifications when your website is down or up.
Then press “Create monitor” at the bottom:

That’s it! You may close that window for now. Our first uptime monitor is up and running!
This is the most basic monitor. UptimeRobot will send a request to your website every 5 minutes. If your website won’t respond in time, you will receive a notification about it in your email.
If you want to make your monitor more advanced, you can switch its type to “Keyword” and select some word that for sure will be on your page or its source code.
This way, if your website responds with the wrong page because of an error or a hacker’s misdeeds, you will be notified as well.
3. Reading our monitor’s stats
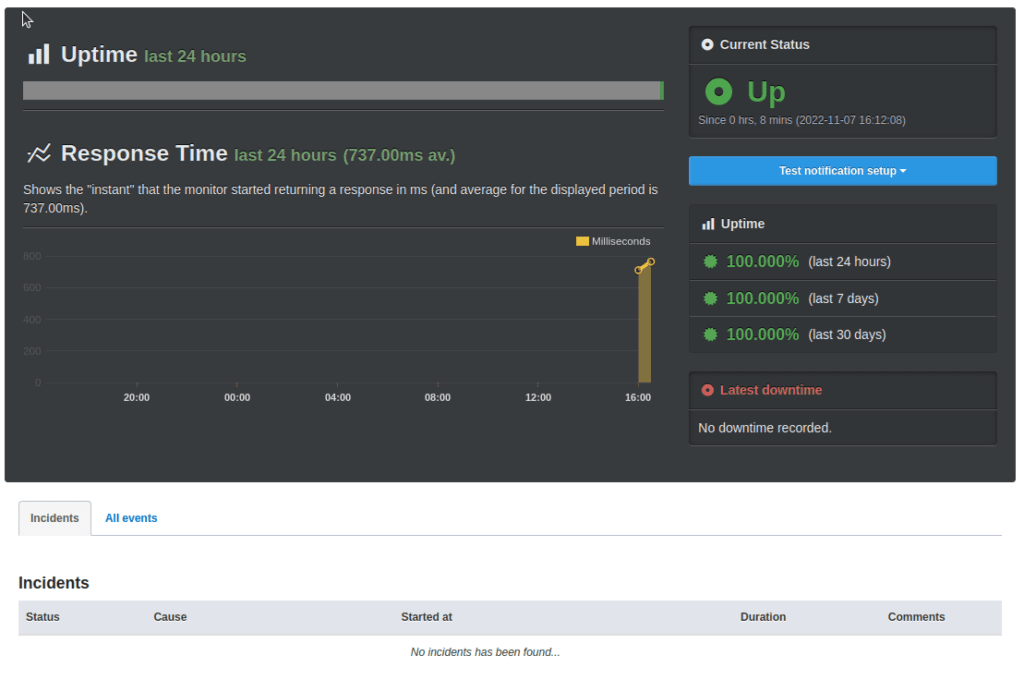
To see the stats of our monitor, just click on it:
For now, it will be nothing interesting there, but with time, that will change.
For example, these are the stats for a similar monitor on my main account:
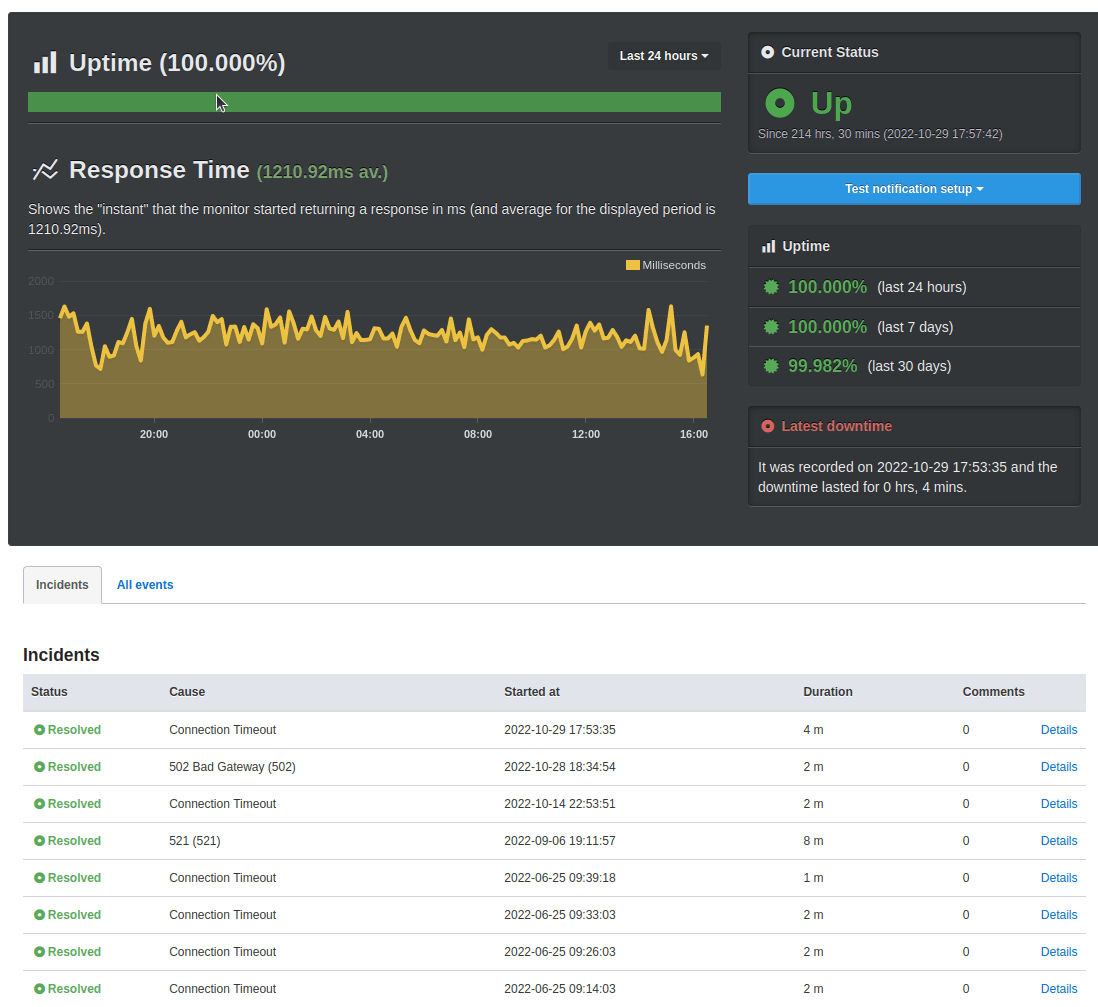
The main stats you need to pay attention to are:
- Uptime in the last 30 days – how your website has performed recently.
- Latest downtime – to see how often it happens and for how long.
- Incidents – it will show every problem that UptimeRobot has detected while monitoring your website.
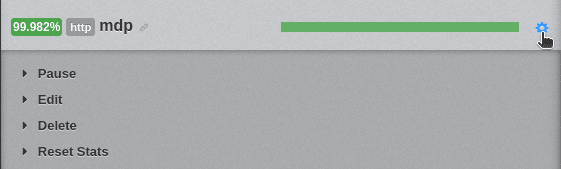
As you can see, makedreamprofits.com has had an uptime of 99.982% in the last 30 days.
Generally, you want to make sure your website has an uptime of at least 99.9%. Otherwise, you may want to change the hosting or be more careful and update it without breaking it so often.
4. Improving notifications
Most uptime monitoring services support a wide range of notification channels.
For UptimeRobot, it can be email, SMS, voice call, webhook, email-to-SMS, Twitter, Telegram, Slack, Discord, and some other 3rd party services.
I prefer to get notifications via Telegram. Do you want to get notifications other than your email? Or maybe to another email that you registered with?
Let’s add another notification channel:
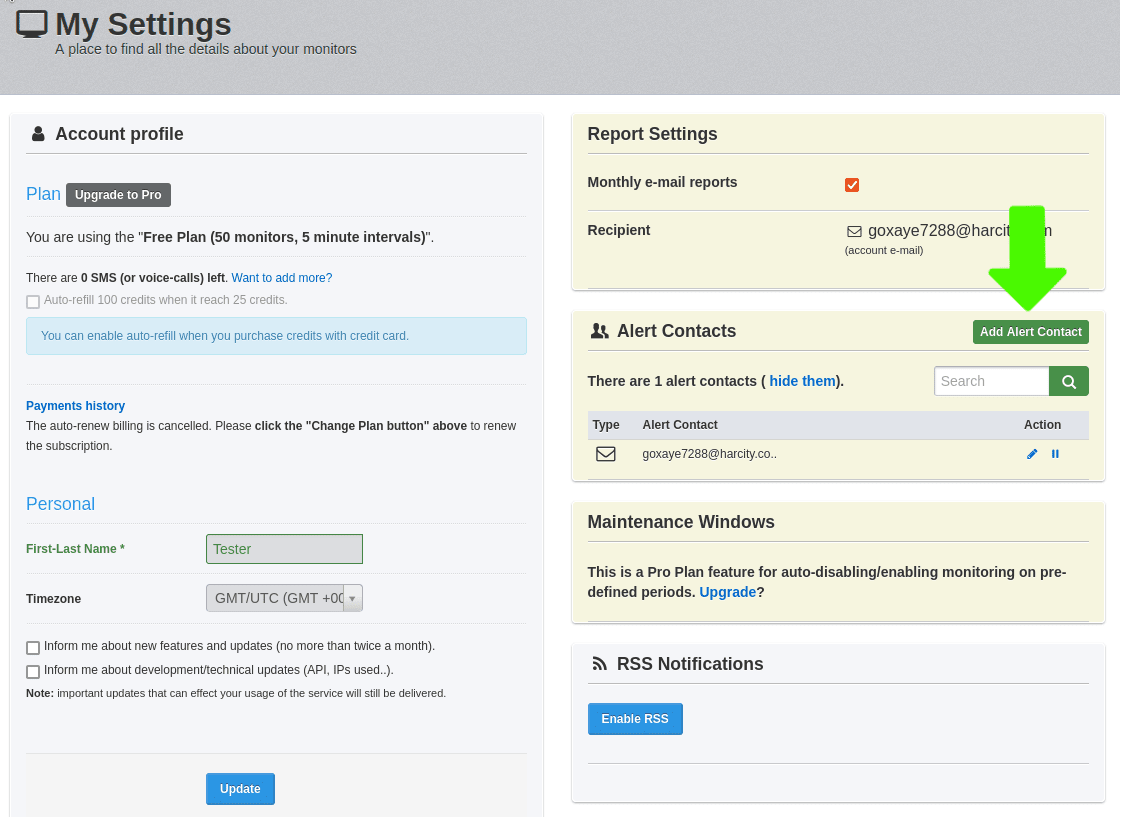
Click the “My Settings” link at the top of the page.
Then find the “Alert Contacts” block at the right and click the button “Add Alert Contact”:
The modal window will pop up. Now, select which type of contact you want to add:

Depending on the type, there will be different settings.
For SMS and calls, you will have to purchase packages of those SMS and calls. For Telegram, to add their bot and activate. Just follow the instructions it will give you.
As I have a “Pro” plan, I use multiple channels at once. For example, after my website is down for 3 minutes, I get notifications in Telegram. If it is down for 10 minutes, I get an SMS.
This way, I can understand the severity of the problem just by the channel the notification came from.
Since we are in “My settings”, I would suggest you change the “Timezone” setting to the correct one.
To make UptimeRobot send notifications to a newly added channel, we should edit our monitor. Click the gear icon next to your monitor and select “Edit”:
In the opened window, you can finally click a checkbox next to your added notification channel, and after saving it, UptimeRobot, in case of problems, will be sending a notification there as well.
Conclusion
Now your website is under constant uptime monitoring. If something happens, you will quickly receive a notification via a convenient channel and fix the problem.
Congratulations! Your website’s health will be much better now.